Why Smart Thermostat Installation is a Game-Changer for Your Home
Smart thermostat installation is a DIY project most homeowners can complete in 30-60 minutes, offering remote temperature control, energy savings up to 15%, and increased home value.
Quick Smart Thermostat Installation Overview:
- Turn off power at the breaker panel.
- Remove old thermostat and photograph existing wiring.
- Label wires according to terminal letters (R, W, Y, G, C).
- Mount new base level on an interior wall.
- Connect wires to corresponding terminals.
- Attach display and restore power.
- Connect to Wi-Fi and configure the app.
Smart thermostats can save up to 15% on heating and cooling costs while giving you complete control from anywhere. Plus, 81% of smart home product owners say they’re more likely to buy a home with smart technology already installed.
This upgrade is surprisingly simple. As Consumer Reports experts put it, “You don’t need to be an electrician or technician to install a smart thermostat.” Most installations work with standard low-voltage systems and take under an hour. The key is proper preparation and knowing if your system needs a C-wire for continuous power.
Safety first: Always turn off power at the breaker before starting. If you see high-voltage wires or feel uncertain, call a professional.

Before You Begin: Preparation and Compatibility
A little prep work ensures your smart thermostat installation goes smoothly. Most homes are ready for the upgrade, but it’s important to check a few things first.
Essential Tools and Materials
You likely have most of what you need for a smart thermostat installation.
- Screwdriver set: A Phillips-head is essential; a flat-head is good to have. Use hand tools, not power drills, to avoid cracking the new base.
- Smartphone: Use it to photograph your old wiring for reference and to download the companion app.
- Wire labels or masking tape: Crucial for marking wires before you disconnect them. A Sharpie and tape work well.
- Drill with bits (optional): Needed if the new mounting holes don’t align with the old ones. A 3/32″ bit is common for drywall.
- Level: Ensures your new thermostat isn’t crooked. Some bases have a built-in level.
- Wire strippers, pencil, and drywall anchors: Good to have on hand for frayed wires or new mounting holes.
Is Your HVAC System Compatible?
Most homes in Southwest Missouri use low-voltage systems, which are ideal for smart thermostats. If your current thermostat has thin wires connected to terminals labeled R, W, Y, G, and C, you have a compatible 24-volt system. Our HVAC Terminology guide can help with unfamiliar terms.
High-voltage systems (110/120V or 240V) are different. They have thicker wires, wire nuts, and high-voltage warnings. If you see these signs, stop. Smart thermostats are not compatible with high-voltage systems, and attempting an installation is dangerous. Call a professional.
Ductless mini-split systems often require specific smart thermostats and have a different installation process.
Before buying, use the manufacturer’s online compatibility checker:
The C-Wire Explained: What It Is and Why It Matters
The “C” or “common” wire provides a continuous 24-volt power supply from your HVAC system to your smart thermostat. This is necessary to power features like Wi-Fi, color displays, and advanced sensors. Older thermostats often ran on batteries or “power stealing,” which isn’t sufficient for modern smart devices.
To check for a C-wire, remove your old thermostat’s faceplate and look for a wire connected to the “C” terminal. Sometimes, an unused C-wire is tucked into the wall behind the thermostat.
If you don’t have a C-wire, you have options. Power extender kits (or C-wire adapters) are a common solution. These connect to your HVAC control board and use existing wires to create a power path. Most manufacturers include or sell these kits. You can learn more about C-wire adapters. For the most reliable performance, a proper C-wire connection is recommended.
Your Step-by-Step Smart Thermostat Installation Guide
With your tools gathered and compatibility confirmed, you’re ready to install your new smart thermostat. Follow these steps carefully for a successful setup.
Step 1: Safety First – Power Down Your HVAC System
Before touching any wires, go to your breaker box (usually in a basement, garage, or utility closet) and find the breakers labeled “furnace,” “air handler,” or “HVAC.” Flip them all to the off position. To confirm the power is off, try to change the temperature on your old thermostat. If the system doesn’t turn on, you’re ready to proceed. This step protects you and your equipment.

Step 2: Remove the Old Thermostat
Pop off the faceplate of your old thermostat. Some may have small screws on the sides or bottom. Before disconnecting anything, take a clear picture of the wiring, ensuring you can see which wire connects to which terminal letter. This photo is your most important reference. Once you have the photo, unscrew the backplate from the wall.

Step 3: Label Wires and Disconnect
The terminal letters (R, W, Y, G, C) are more important than the wire colors. Use the labels included with your new thermostat or masking tape to label each wire according to the terminal it was connected to on the old unit. After labeling, carefully disconnect each wire. To prevent them from falling back into the wall, tape the wires to the wall or wrap them around a pencil.
Step 4: Mount the New Smart Thermostat Base
Position the new backplate on the wall. You can use the included trim plate to cover any marks from the old unit. Use a level to ensure the backplate is straight, then mark the screw locations. If needed, drill new pilot holes and insert drywall anchors. Feed your labeled wires through the opening in the base, then screw the base securely to the wall with a screwdriver.
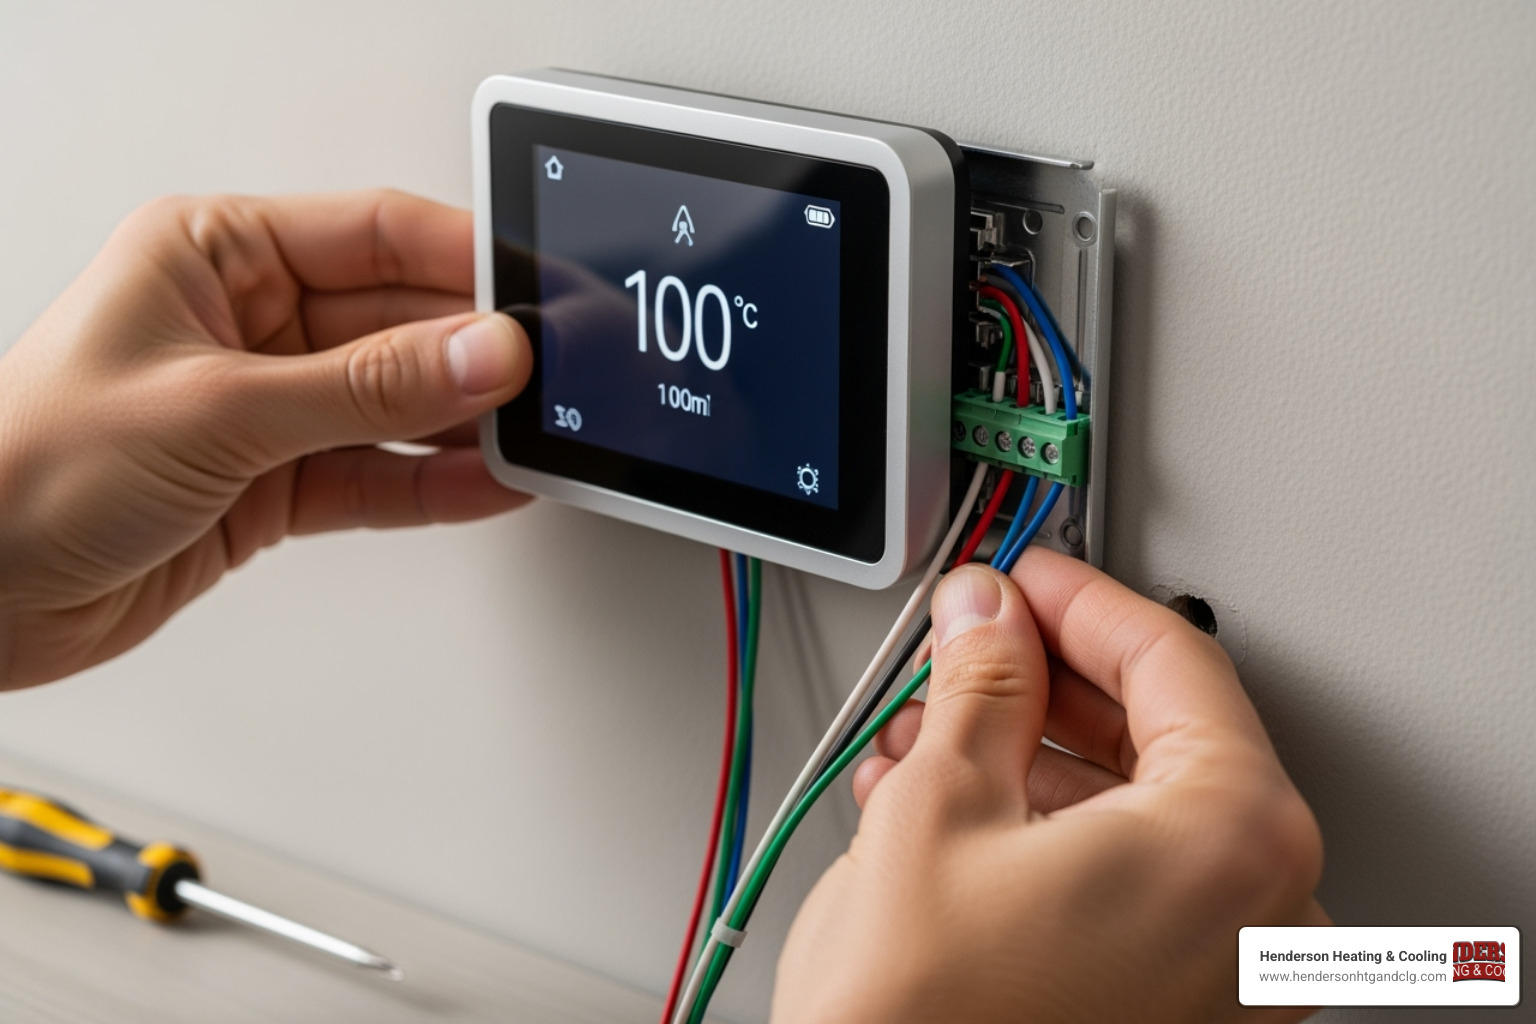
Step 5: A Guide to Your Smart Thermostat Installation Wiring
Using your photo as a guide, connect each labeled wire to the corresponding terminal on the new base (e.g., the “R” wire goes to the “R” terminal). Most smart thermostats have push-in terminals; ensure each wire is securely connected. Smart thermostats typically have internal jumpers, so you can discard any small jumper wires (like those between “Rh” and “Rc”) from your old setup. Tuck any excess wire back into the wall.
Step 6: Attach the Faceplate and Power Up
Snap the new thermostat display onto the mounted base until it clicks into place. Go back to your breaker box and restore power to your HVAC system. The new thermostat should power on and begin its startup sequence. Follow any on-screen prompts. The physical smart thermostat installation is now complete. For ongoing efficiency, learn more about how an AC Tune Up Boost Efficiency in Homes.
Final Setup: Connecting and Configuring Your Device
With the physical smart thermostat installation complete, it’s time to connect your device and configure its smart features.

Connecting to Wi-Fi and the Companion App
Your thermostat will guide you through the initial setup on its screen, including selecting your language and connecting to Wi-Fi. Select your home network from the list and enter your password. Most smart thermostats work best with 2.4GHz Wi-Fi networks.
While it connects, download the companion app for your device from the Apple App Store or Google Play. Follow the app’s instructions to create an account and pair it with your thermostat, which often involves scanning a QR code or entering a setup code from the thermostat’s screen.
Basic Configuration and Scheduling
The app will guide you through configuring your thermostat for optimal performance and savings.
- Set your location: This allows the thermostat to use local weather data to make smarter heating and cooling decisions.
- Confirm your HVAC system details: The app usually auto-detects your system type (furnace, heat pump, etc.) from the wiring, but it’s good to double-check for accuracy.
- Enable scheduling and learning: Many models can learn your routine over the first week and build a schedule automatically. Alternatively, you can set a manual schedule to define temperatures for different times of the day.
- Explore energy-saving features: Take advantage of “Away” modes that adjust the temperature when you’re not home, vacation settings, and detailed energy reports that help you track usage and maximize savings.
These features make energy efficiency nearly effortless. For more tips, see our Spring Energy Saving Tips for AC System.
Troubleshooting and When to Call a Professional
Even a careful smart thermostat installation can have minor issues. Most are simple to fix, but it’s also important to know when to call a professional.
Common Smart Thermostat Installation Issues
- Thermostat won’t power on: First, ensure you flipped the correct breaker back on. Second, re-check your wiring connections to make sure they are secure. Third, confirm your C-wire is properly connected if your thermostat requires one.
- Blown fuse: If your entire HVAC system is unresponsive, you may have blown a low-voltage fuse in your furnace or air handler, often from wires touching during installation. This highlights the importance of turning off the power first.
- HVAC system unresponsive: Many systems have a 5-10 minute safety delay after power is restored. Wait a few minutes. If it still doesn’t work, review your wiring photo and check every connection.
- Wi-Fi connectivity problems: Ensure your thermostat is within your router’s range and that you entered the password correctly. Restarting your router and thermostat can often resolve connection issues.
- Incorrect temperature readings: The thermostat’s location is key. If it’s in direct sunlight, near a draft, or close to a heat source, its readings will be inaccurate. Some models allow for temperature calibration in the settings.
Why DIY Isn’t Always the Answer
While many installations are straightforward, some situations require a professional.
- High-voltage systems: If you see thick wires and wire nuts, stop immediately. These 110/120V or 240V systems require a licensed professional.
- Complex wiring: If your wiring doesn’t match the standard R, W, Y, G, C pattern (e.g., you have a multi-stage system, dual-fuel setup, or zoning), it’s best to call an expert to avoid damaging your equipment.
- C-wire adapter installation: Installing an adapter at the furnace control board can be complex. If you’re not comfortable working inside your furnace, a professional can do it safely.
A professional installation prevents costly damage to your HVAC system’s sensitive electronics and provides peace of mind. If you feel uncertain at any point, trust your instincts and call for help. Henderson Heating & Cooling is here to assist homeowners in Lebanon, St. Robert, and Camdenton. Learn more about [Why HVAC Service Beats DIY Solutions](https://www.hendersonhtgandclg.com/why-hvac-service-beats-diy-solutions/) or use our [HVAC Troubleshooter](https://www.hendersonhtgandclg.com/hvac-troubleshooter/).
Frequently Asked Questions about Smart Thermostat Installation
Here are answers to common questions about smart thermostat installation.
Can I install a smart thermostat myself?
Yes, most homeowners can install a smart thermostat if they have a standard low-voltage (24-volt) system. These systems have thin wires connected to terminals like R, W, Y, and G. The installation is straightforward if you can follow instructions and are comfortable with basic tools. However, if you have a high-voltage system (thick wires) or complex wiring, it’s best to call a professional.
What if my old thermostat has only two wires?
A two-wire setup usually indicates a simple heat-only system. Most smart thermostats require more wires for power, specifically a C-wire. Without a C-wire, the thermostat may not function correctly. You may have unused wires tucked in the wall, or you might need a C-wire adapter. Installing an adapter can be complex, so we recommend consulting an HVAC technician to determine the best solution for a two-wire system.
How long does a smart thermostat installation take?
For a compatible system, a typical smart thermostat installation takes 30 to 60 minutes. The process is quicker if you prepare your tools and confirm compatibility beforehand. The timeline can be longer if you need to drill new holes, install a C-wire adapter, or run into unexpected wiring issues. Taking your time to do it right is more important than speed.
Conclusion: Enjoy a Smarter, More Efficient Home
By completing your smart thermostat installation, you’ve made your home more connected and intelligent. You now have complete comfort and control over your home’s climate from anywhere via your smartphone.
The energy efficiency benefits are significant, with potential savings of up to 15% on heating and cooling bills as your system operates with greater precision. This upgrade also provides peace of mind, eliminating worries about whether you left the heat or AC running.
At Henderson Heating & Cooling, we are proud to serve homeowners throughout Southwest Missouri, including Lebanon, St. Robert, and Camdenton. We believe every home deserves to be comfortable and efficient. Our expertise with Daikin systems and our Comfort Promise mean we’re always here when you need us.
If you ran into challenges or prefer the confidence of a professional installation, our team is ready to help optimize your HVAC system. Your new smart thermostat is just the beginning. When you’re ready for a system tune-up, repair, or other upgrades, we’re your local experts.
Ready to keep your smart home running at peak performance? Schedule your AC Repair in Lebanon, MO or reach out for any heating and cooling needs. We’re here to ensure your investment pays dividends in comfort and savings for years to come.